
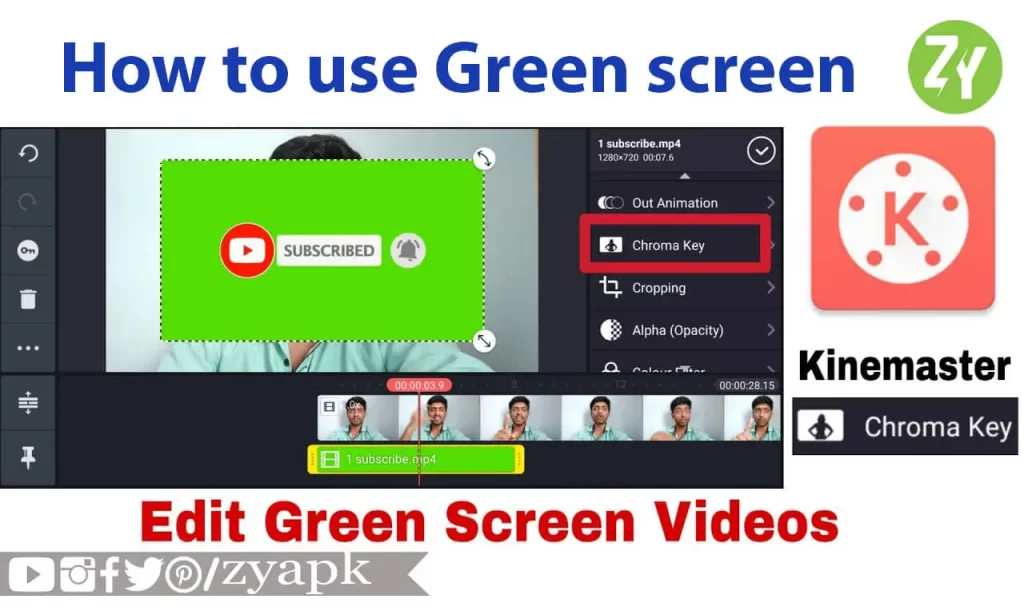
How To Use Green Screen on Kinemaster?
“How to Use Green Screen on Kinemaster” is more than just a query—it’s a doorway to the transformative world of video editing. The green screen, or chroma key effect, has long been a fundamental tool in the filmmaker’s arsenal, enabling the seamless fusion of subjects with fantastical or virtual backgrounds. In recent years, Kinemaster has emerged as a premier platform for both budding videographers and seasoned professionals alike, largely due to its user-friendly interface and robust capabilities. This guide aims to demystify the process of harnessing the green screen’s potential within Kinemaster. From setup to execution, we’ll walk you through every pivotal step, ensuring that by the end, you’ll be well-versed in crafting visual masterpieces using this essential technique.
Read: How To Use KineMaster
How To Use Green Screen on Kinemaster:
Preparation
Before you start, ensure you’ve recorded your footage in front of a green screen. The screen should be evenly lit with no shadows or wrinkles to achieve the best result.
1. Create a New Project
2. Import Background Video or Image
Tap on the Media button to add your background clip or image. This is what will replace the green in your green screen footage.
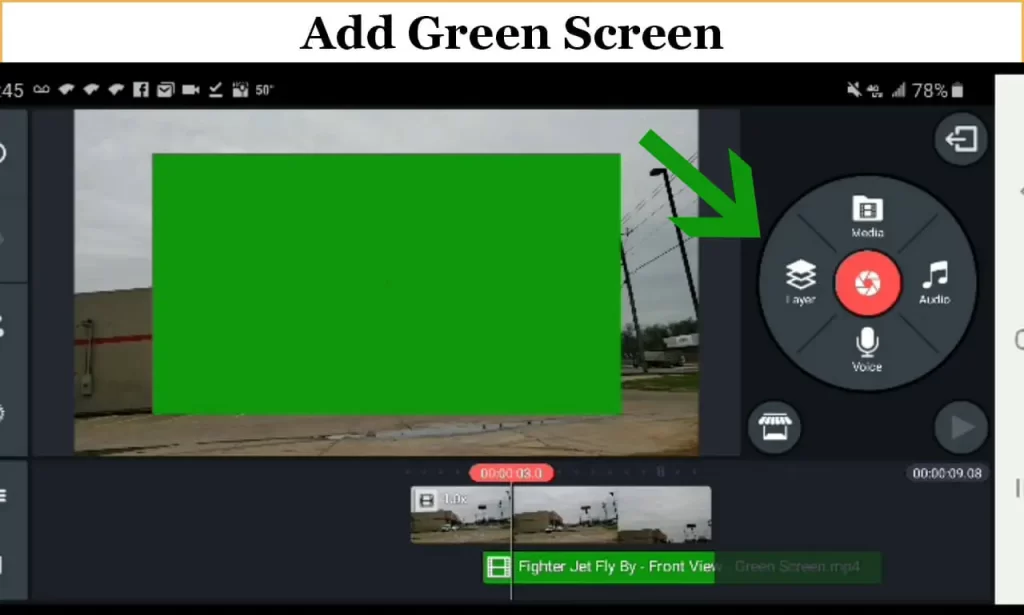
3. Add Green Screen Footage
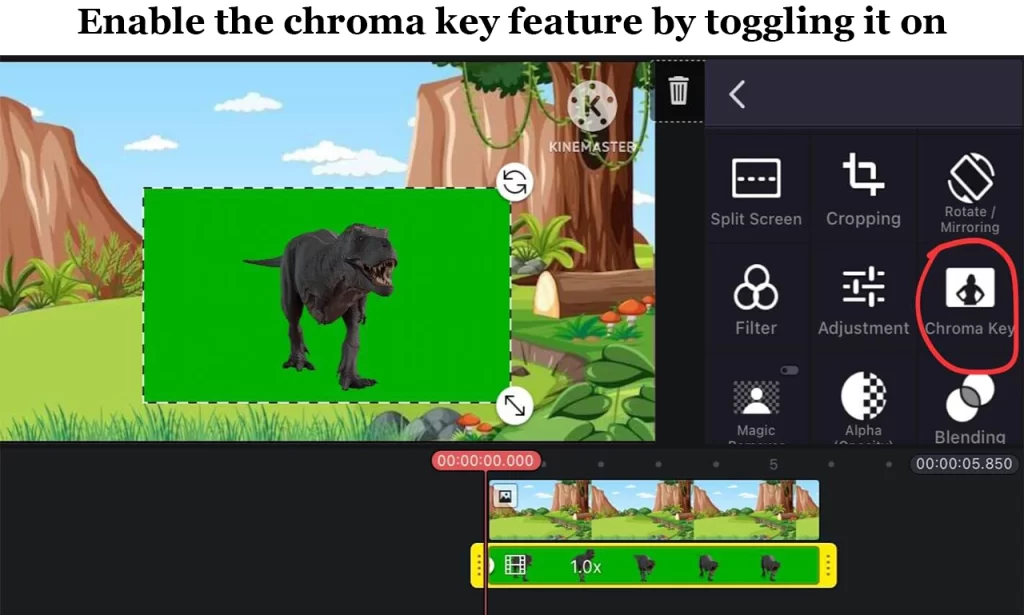
4. Apply Chroma Key
Read: How to Make Slow Motion Video in KineMaster
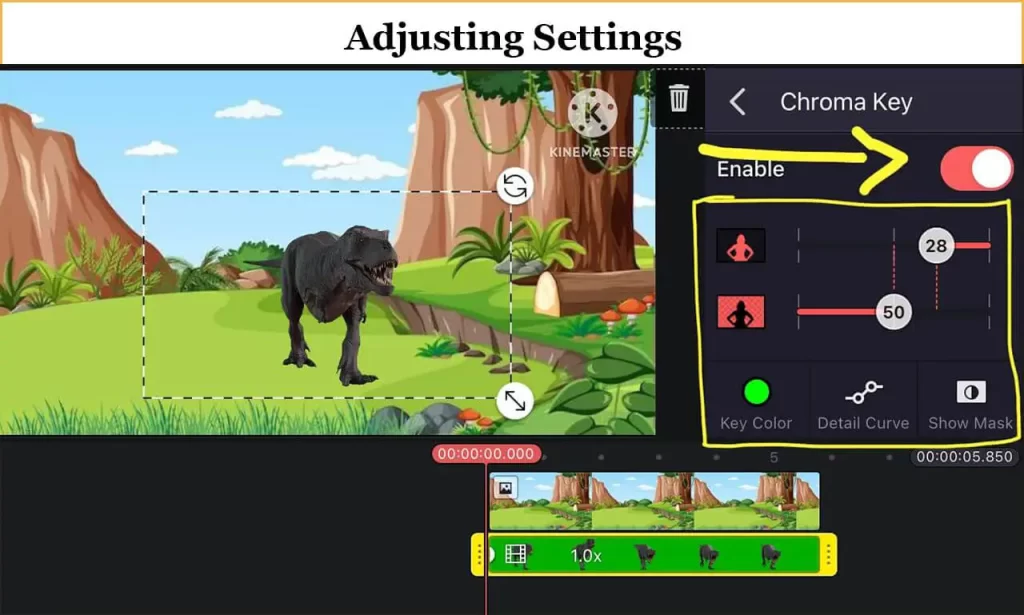
5. Adjusting Settings
Once enabled, Kinemaster will automatically try to remove the green color. However, you can fine-tune the effect:
- Color Picker: Use this to select the exact shade of green (or any other color) you want to remove if the automatic selection isn’t perfect.
- Adjust sliders: Modify settings like Foreground, Background, Edging, and Feathering to refine the effect. This can help eliminate any leftover green hues and make the merge between your green screen footage and the background look more natural.
6. Review Your Video
Play back your video in the preview to ensure the green screen effect looks smooth. Make any necessary adjustments.
7. Export Your Project
- Once satisfied, tap on the export or share button (usually an upward-pointing arrow or a floppy disk icon).
- Choose your desired video resolution and frame rate.
- Tap Export to save your video.
8. Share or Further Edit
After exporting, you can share your video to various platforms directly from Kinemaster or further edit it using other software or apps.
Tips:
Make sure your green screen setup is as clean and consistent as possible. This means no wrinkles, shadows, or different shades. A well-lit green screen will make the chroma-keying process more effective.
Always review the entire video before exporting to catch any anomalies or issues in the green screen effect.
With practice, using the green screen feature in Kinemaster will become second nature. It’s a powerful tool that can significantly enhance the production quality of your videos.
FAQ
Conclusion
How To Use Green Screen on KineMaster Harnessing the green screen effect in Kinemaster opens up a realm of creative possibilities for video creators, from amateurs to professionals. Whether you’re aiming to transport your subjects to fantastical worlds or simply looking to create compelling content with dynamic backgrounds, the chroma key feature in Kinemaster is an indispensable tool.